Bog Filtration is not something that has been developed over the last few years. Upflow, as well as other types of Bog and Wetlands Filtration have been used for centuries. Wetlands, Delta zones, Salt Water Estuaries, Side flow, a Septic Tank system, think about it: A commode flushes (your pump), sending water and whatever organics and contaminants through the pipe into a holding area (bog vault). When there is enough water it will flow out through the field lines (larger gravel medias) and out into the dirt (pea gravel). As it exits, it’s been cleaned and scrubbed by bacteria, returning it to its original, clean state. No, Biological/Bacterialogical Bog filtration is not new to humanity, or the pond and water garden industry.
How to make your own bog filter in 18 Easy Steps:
What you need:
12”-18" ABS Single or DoubleWall Drain Pipe (The black, cheap corrugated stuff you use for drainage) this will be your cleanout chimney vault. You want it large enough to accommodate your cleanout pump and piping. (I prefer 18”)
6"-8”ABS doublewall Drain Pipe (Don’t use single wall, it’s too flimsy, and crud will accumulate and lay in the corrugations, and not flush out). The larger the flow needed, the larger and longer the pipe for your diffuser. See main article for appropriate length of your diffuser pipe.
A chain saw, or something similar (to cut slots in diffuser pipe).
Jig Saw, Saws All or Roto Zip
6"-8” End Cap for Double Wall Pipe, based on which size you use. 1 per diffuser ( In these photos, 6” is shown).
A 18”-24” stepping stone, depending on which size pipe you use. (For your chimney cap)
You say that's it? Yes it is very simple and all these components are sold at any plumbing, piping, or irrigation supply company. Contact your local supplier for availability.
NOTE: The sizes and lengths may vary depending on your needs. The pipe you need may only be sold in 20' lengths. So your initial investment may be for more than just one system. It keeps along time. Just keep it in the shade, or indoors.
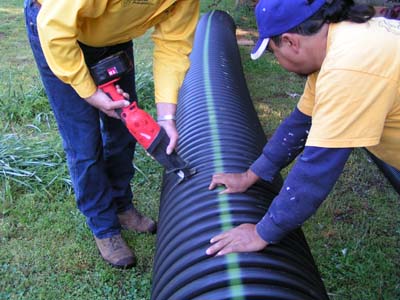
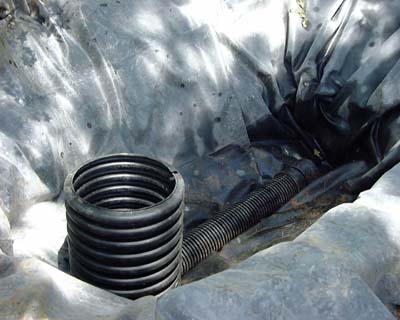
Step #1: Determine how long (tall) your clean out chimney pipe (12”-18" ABS) needs to be to reach within 2-4" of the top of your bog area’s final water level. Cut to length using Saws All or Jig Saw. In this photo, we went 32” for a 36” deep filter. Also, note, top of chimney must be below final water level of your filter, otherwise, mosquitoes will colonize there. Not too deep, though, or it is a bugger to uncover for cleanouts without half your gravel falling down in it. Just enough to not hold air for mosquitoes to live in.
.JPG)
.JPG)
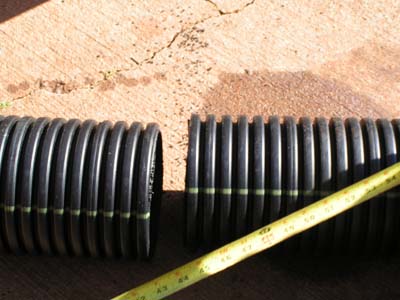
Step #2: Cut 6"- 8” (In this photo, 6”)ABS for length of diffuser and put on the end cap. On this one, we used a 48” long diffuser with slots every five inches, to handle up to a 5000 gallon per hour (gph) pump. We actually only used a 3000 gph pump, and it worked beautifully, no dead spots anywhere.
.JPG)
.JPG)
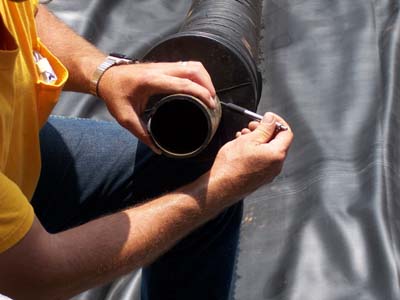
Step #3: Cut a snug hole in the end cap to insert your flex pipe. Do you need to put in a bulkhead fitting? Not really, the water is going to seep out the slots anyway, so why spend the extra money? Just make sure that about 6” of pipe is inside the diffuser, and take care in stacking your initial layers of rock, that it isn’t dislodged, or pulled from the diffuser.
.JPG)
.JPG)
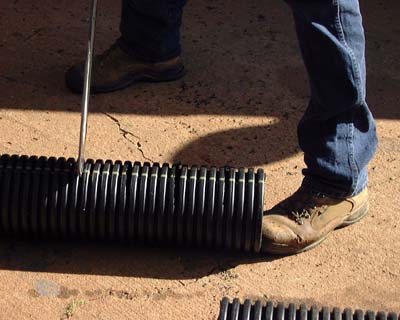
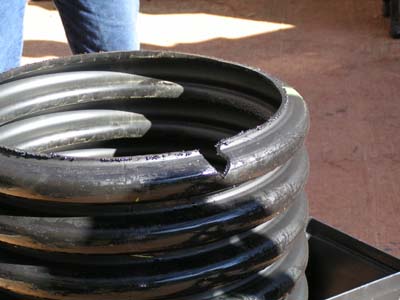
Step #4: Cut slots in ABS diffuser pipe ( in this photo a 6”) to allow water to flow out of pipe. We strongly suggest using double wall pipe. It’s stronger, and has a smooth inside wall, allowing debris to slide right in to the cleanout chimney vault without building up in the corrugations. These slots should be no closer than 5". The more slots, the more water that will flow out. These slots should be cut at least, but no more than, half way through the pipe. You don’t want the slots too close, or the pipe could collapse from the weight of all the rocks and gravel on top. These slots will face UP.
.JPG)
.JPG)
.JPG)
Step #5: Using the Jig Saw or Saws All cut a small "V" on the top edge of the 12”-18" cleanout chimney pipe. This will be your air vent.
.JPG)
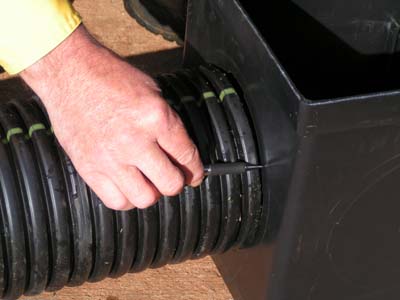
Step #6: Place the diffuser up to your cleanout chimney, and scribe a circle around it, about 2 corrugations up from what will be the bottom. (Your top has the “v” notch). Cut this circle out with either a jigsaw or sawzall. Make sure the diffuser will slip in.
.JPG)
.JPG)
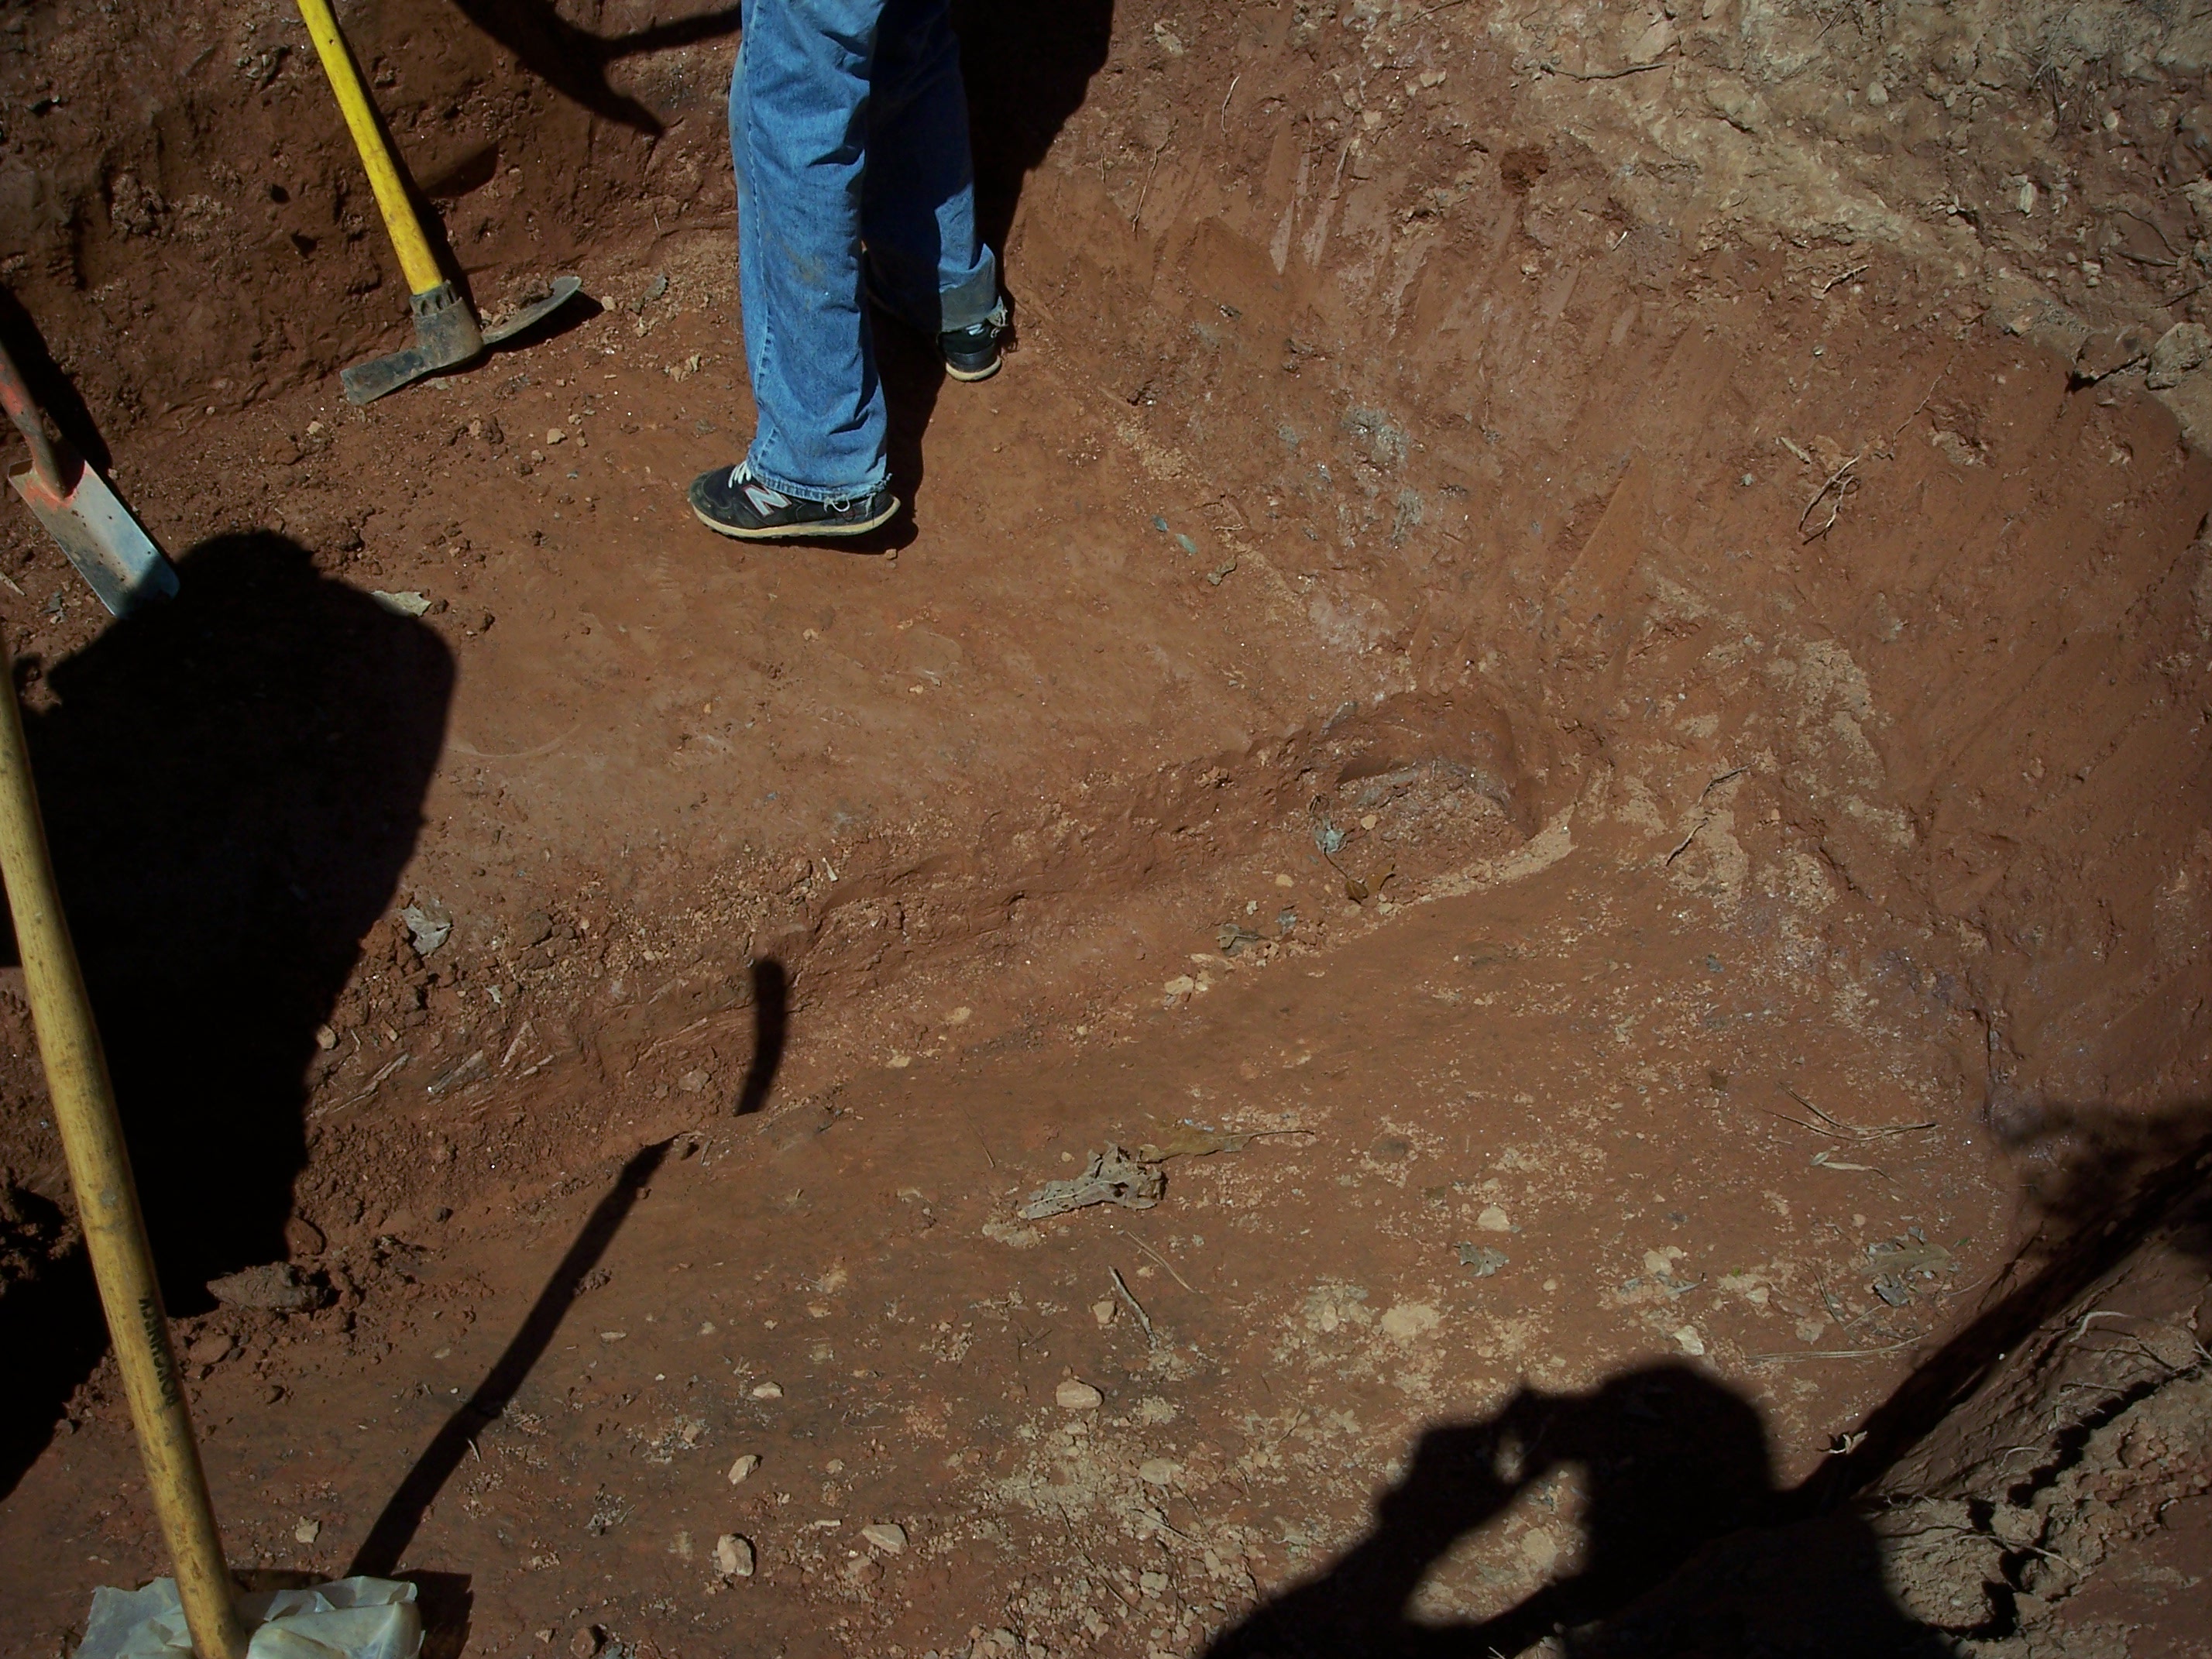
Step #7: Digging out and shaping hole for bog vault and diffuser/chimney assembly. You want the12”-18" cleanout chimney to be level/plumb. But you want the chimney end of your diffuser trench to be just slightly lower than the end cap of the diffuser tube. WHY? So that the silt was settle into the bottom of the cleanout chimney, to be cleaned out as needed for the filter to remain effective. Note the slope of the bottom 180° from the diffuser trench. This helps with back flushing. An almost flat bottom vault won’t backflush easily or completely. The sloped bottom will also require less of the larger size stones to level it out.
.JPG)
.JPG)
.JPG)
.JPG)
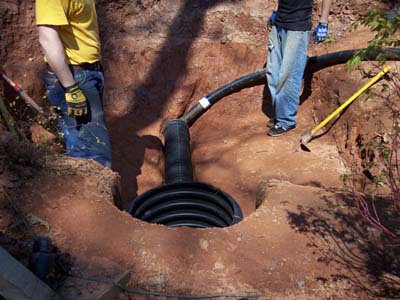
Step #8: Place bog filtration unit in bog vault excavation area, and check for level, and proper fitting. Make sure you leave a little room at all sides and edges, as you will be putting in underlayment and liner in before you reset the unit. Once everything fits and checks out, pull it up and out and proceed to next step.
.jpg)
.JPG)
.JPG)
Step #9: Place underlayment and liner in bog area.
.JPG)
.JPG)
.JPG)

Step #10: Place bog filtration unit in pre-designed area.
.JPG)
.JPG)
Step #11: Place flex PVC pipe into end cap.
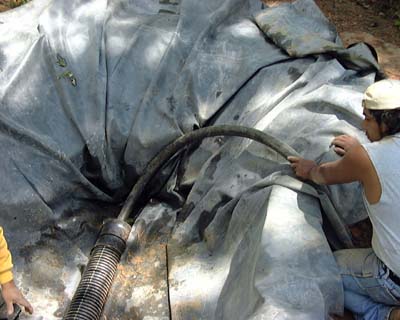
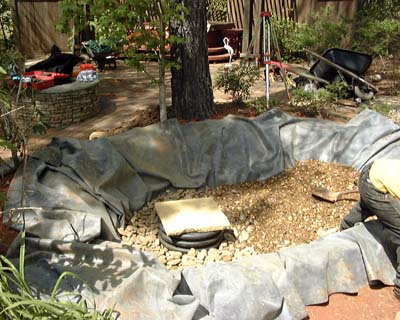
Step#12: Place large river rounds around unit and pipe making sure not to dislodge unit out of pre-designed area.
.JPG)
.JPG)
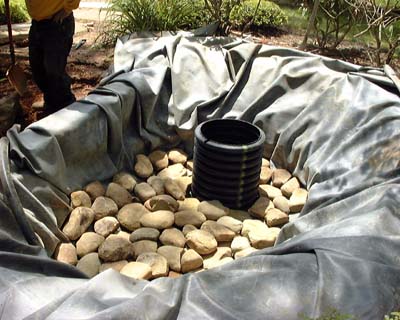
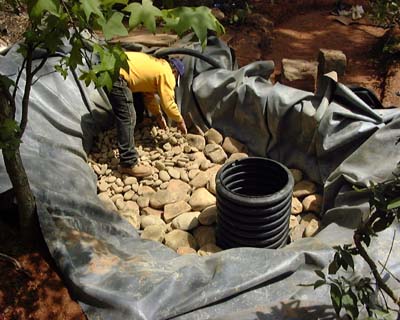
Step #13: Depending on the size of the bog area will depend upon how many layers of river rounds you use. Now place your egg rock. After placing this layer, we would suggest doing a quick backflush to the cleanout chimney to rinse out dirt and silt.
.JPG)
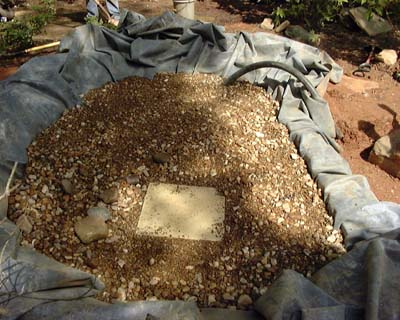
Step #14: Place end cap or flagstone on top of 12”-18" ABS pipe.
.JPG)
Step #15: Fill up the rest with pea sized gravel. Make note where the cleanout chimney cover is by placing a rock on it. Again, backflush the gravel briefly and drain dirty water.
.JPG)
.JPG)
Step #16: Place small mini boulder over the cleanout pipe cover. Now when you’re ready to clean out the silt trap, you remove the rock, move about 2" of gravel and you have uncovered the silt trap/cleanout chimney for easy clean out. See related topics section on how to clean/backflush an upflow bog filter.
.JPG)
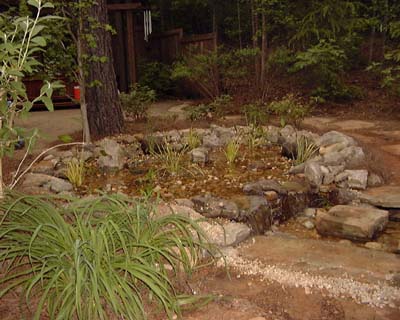
Step #17: Dress out bog area with aquatic, marginal plants. See related topics section for plants that work well in a bog/wetlands filter.
.JPG)
.JPG)
.JPG)
.JPG)
.JPG)
.JPG)
.JPG)
Step #18: Start your main pond pump and seed the bog with a good bacteria. Pour the bacteria solution right into the pump. Your water may be milky or hazy for a little bit, but will clear up quickly, usually in less than 24 hours, depending on the size of your pond and turnover frequency.